
This post may contain affiliate links. Please read my disclosure policy .
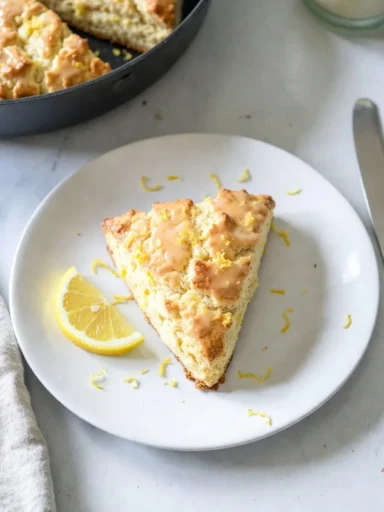
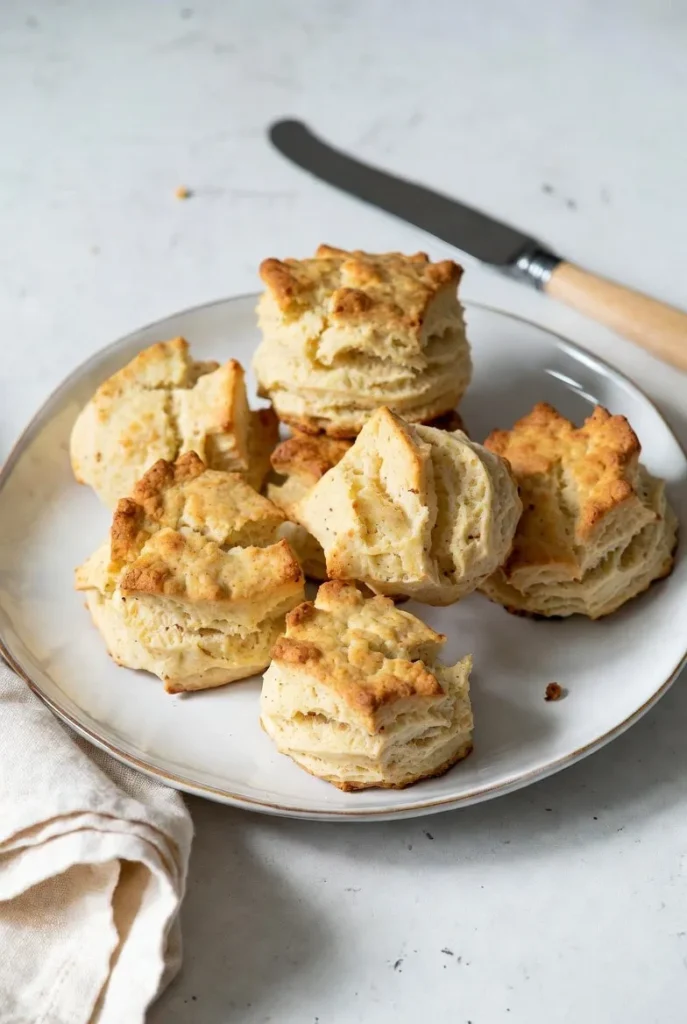
If you’re looking for a taste of Ireland in every bite, you’ll love these gluten free Irish scones, perfect for a cozy afternoon with a cup of tea or as a special treat for St. Patrick’s Day.
Why You’ll Love This Recipe
This recipe for gluten free Irish scones is designed to be easy to follow and replicates the traditional Irish scone experience without the gluten, making it accessible to everyone.
What makes these scones truly special is the combination of gluten free flours and the inclusion of buttermilk, which gives them a moist and tender texture, similar to traditional Irish scones made with gluten.
Ingredients
To make these delicious gluten free Irish scones, you’ll need the following ingredients:
2 cups gluten-free all-purpose flour , This is the foundation of our scones, providing structure without the gluten.
1/4 cup granulated sugar , A touch of sweetness to balance out the savory flavors of the scones.
1/2 teaspoon baking soda , Helps the scones rise and gives them a light texture.
1/2 teaspoon salt , Enhances the flavors of the other ingredients and adds depth to the scones.
1/2 cup cold unsalted butter, cut into small pieces , The butter adds flavor and helps to create a flaky texture in the scones.
3/4 cup buttermilk , The acidity in the buttermilk reacts with the baking soda to help the scones rise and gives them a tender crumb.
1 large egg , Binds the ingredients together and adds moisture to the scones.
1 teaspoon vanilla extract , Adds a hint of flavor and aroma to the scones.
Raisins or currants (optional) , For an extra burst of sweetness and traditional Irish flavor.
Why These Ingredients
Gluten-Free Flour
The choice of gluten free flour is crucial in this recipe. A blend that contains a mix of rice flour, potato starch, and tapioca flour works well, as it provides structure and texture similar to wheat flour.
However, feel free to experiment with different blends to find the one that works best for you.
Buttermilk
Buttermilk is essential for the tenderness and rise of the scones. If you don’t have buttermilk, you can make a substitute by mixing 1 cup of milk with 1 tablespoon of white vinegar or lemon juice and letting it sit for 5-10 minutes.
Cold Unsalted Butter
Cold butter is crucial for creating a flaky texture in the scones. Make sure to keep the butter in the fridge until you’re ready to use it, and handle it as little as possible to prevent it from warming up.
Instructions
Let’s walk through the steps to make these gluten free Irish scones:
Step 1: Preheat and Prep , Preheat your oven to 400°F (200°C). Line a baking sheet with parchment paper and lightly dust it with gluten-free flour.
Step 2: Mix Dry Ingredients , In a large bowl, whisk together the gluten-free flour, sugar, baking soda, and salt until well combined.
Step 3: Add Cold Butter , Add the cold butter to the dry ingredients and use a pastry blender or your fingers to work the butter into the flour mixture until it resembles coarse crumbs.
Step 4: Combine Wet Ingredients , In a separate bowl, whisk together the buttermilk, egg, and vanilla extract until smooth.
Step 5: Bring the Dough Together , Pour the wet ingredients into the dry ingredients and stir until the dough comes together in a shaggy mass. If using raisins or currants, fold them into the dough at this stage.
Step 6: Shape the Scones , Turn the dough out onto a floured surface and gently knead it a few times until it comes together. Pat the dough into a circle that is about 1 inch (2.5 cm) thick.
Use a biscuit cutter or the rim of a glass to cut out scones. Gather the scraps, re-form the dough, and cut out additional scones.
Step 7: Bake the Scones , Place the scones on the prepared baking sheet, leaving about 1 inch (2.5 cm) of space between each scone. Brush the tops with a little extra buttermilk and sprinkle with sugar.
Bake for 15-20 minutes, or until the scones are golden brown.
How To Serve
These gluten free Irish scones are best served fresh, but they can also be stored for later use. Here are a few ideas for serving:
Serve warm with a pat of butter and a drizzle of honey for a simple but satisfying treat.
Pair with your favorite jam or preserves for a sweet and tangy combination.
Use as a base for breakfast by topping with scrambled eggs, bacon, or sausage.
Enjoy with a cup of tea, such as Irish breakfast or Earl Grey, for a traditional Irish experience.
How To Keep Leftovers
Room Temperature
Scones can be stored at room temperature for up to 2 days. Keep them in an airtight container to maintain freshness.
Refrigerator
For longer storage, scones can be kept in the fridge for up to 5 days. Wrap them tightly in plastic wrap or aluminum foil and place in an airtight container.
Freezer
Scones can be frozen for up to 2 months. Wrap them tightly in plastic wrap or aluminum foil and place in a freezer-safe bag.
To thaw, leave at room temperature overnight or reheat in the oven or microwave.
Top Tips
Use Cold Ingredients
Cold ingredients, especially the butter and buttermilk, are crucial for creating a flaky and tender texture in the scones.
Don’t Overmix
Overmixing the dough can lead to tough scones. Mix the ingredients just until they come together in a shaggy mass, then stop mixing.
Use the Right Gluten-Free Flour
Not all gluten-free flours are created equal. Experiment with different blends to find the one that works best for you.
Don’t Overbake
Scones are best when they’re lightly golden. Overbaking can make them dry and crumbly.
Experiment with Flavors
Try adding different flavors to your scones, such as dried fruits, nuts, or spices, to create unique and delicious variations.
Final Thoughts
Making gluten free Irish scones is a bit of an art, but with practice and patience, you can create delicious and authentic treats that everyone will love.
Remember, the key to success lies in using cold ingredients, not overmixing the dough, and baking the scones just until they’re lightly golden.
Gluten Free Irish Scones: Authentic Recipe for a Delicious Treat
Description
Warm, flaky, and tender, these gluten-free Irish scones are perfect for a cozy afternoon with a cup of tea. Made with gluten-free flour and buttermilk, they're a delicious treat for anyone looking for a traditional Irish experience without the gluten.
Ingredients
Instructions
-
Preheat the oven to 400?F (200?C) and line a baking sheet with parchment paper.
-
In a large bowl, whisk together the gluten-free flour, sugar, baking soda, and salt until well combined.
-
Add the cold butter to the dry ingredients and use a pastry blender or your fingers to work the butter into the flour mixture until it resembles coarse crumbs.
-
In a separate bowl, whisk together the buttermilk, egg, and vanilla extract until smooth.
-
Pour the wet ingredients into the dry ingredients and stir until the dough comes together in a shaggy mass.
-
Turn the dough out onto a floured surface and gently knead it a few times until it comes together.
-
Pat the dough into a circle that is about 1 inch (2.5 cm) thick and use a biscuit cutter or the rim of a glass to cut out scones.
-
Place the scones on the prepared baking sheet, leaving about 1 inch (2.5 cm) of space between each scone.
-
Brush the tops with a little extra buttermilk and sprinkle with sugar.
-
Bake for 15-20 minutes, or until the scones are golden brown.
Nutrition Facts
Servings 8
- Amount Per Serving
- Calories 250kcal
- % Daily Value *
- Cholesterol 20mg7%
- Sodium 200mg9%
- Potassium 100mg3%
- Total Carbohydrate 35g12%
- Dietary Fiber 2g8%
- Sugars 10g
- Protein 5g10%
- Vitamin A 10 IU
- Calcium 100 mg
- Iron 5 mg
- Vitamin K 10 mcg
- Thiamin 10 mg
- Riboflavin 10 mg
- Niacin 10 mg
- Vitamin B6 5 mg
- Folate 20 mcg
- Biotin 5 mcg
- Pantothenic Acid 5 mg
- Phosphorus 100 mg
- Magnesium 20 mg
- Zinc 5 mg
- Selenium 10 mcg
- Copper 5 mg
- Manganese 5 mg
- Chromium 5 mcg
- Molybdenum 5 mcg
- Chloride 100 mg
* Percent Daily Values are based on a 2,000 calorie diet. Your daily value may be higher or lower depending on your calorie needs.
Note
For an extra-flaky texture, make sure to keep the butter and buttermilk cold. If you don't have buttermilk, you can make a substitute by mixing 1 cup of milk with 1 tablespoon of white vinegar or lemon juice and letting it sit for 5-10 minutes.
Frequently Asked Questions
Is this recipe easy to make?
Yes, this recipe is very beginner-friendly and comes together in under 30 minutes.
Can I make it ahead of time?
Absolutely. You can prepare it up to 2 days in advance and store it in the fridge.
Are gluten free Irish scones suitable for everyone?
While gluten free Irish scones are a great option for those with gluten intolerance or sensitivity, they may not be suitable for everyone, especially those with severe gluten allergies. Always check the ingredients and manufacturing process to ensure safety.
Can I substitute buttermilk with regular milk?
While you can substitute buttermilk with regular milk, the result might be slightly different. Buttermilk contains acidity that helps the scones rise and gives them a tender texture. If using regular milk, you might need to add a bit of vinegar or lemon juice to replicate this effect.
How do I store leftover scones?
You can store leftover scones in an airtight container at room temperature for up to 2 days, in the fridge for up to 5 days, or freeze them for up to 2 months.