
This post may contain affiliate links. Please read my disclosure policy .
As Easter approaches, many of us start thinking about the traditional Easter chocolate treats that we love to enjoy during this holiday. Easter chocolate is a big part of the Easter celebration, and creating your own Easter chocolate treats can be a fun and rewarding experience.
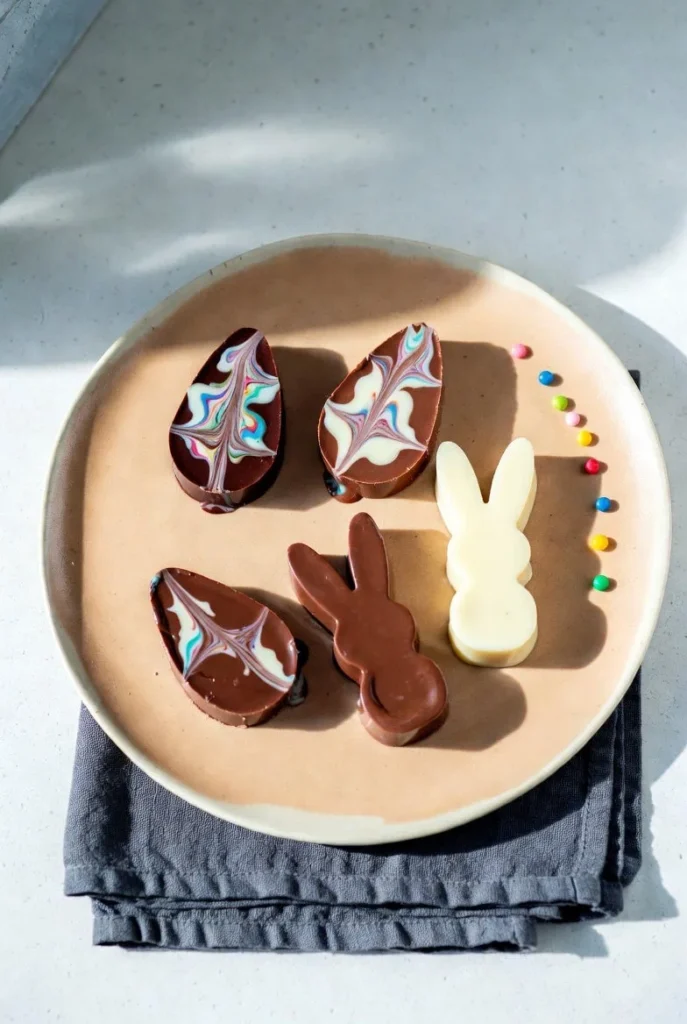
In this recipe, we’ll show you how to make your own Easter chocolate creations, including decorated chocolate bunnies, Easter eggs, and other delicious treats.
Why You’ll Love This Recipe
This recipe is perfect for anyone who loves Easter chocolate and wants to create their own unique Easter treats. With this recipe, you’ll be able to make a variety of Easter chocolate creations, from simple decorated chocolate bunnies to intricate Easter eggs.
The best part is that you can customize your Easter chocolate treats to fit your own personal style and preferences.
Whether you’re looking to make Easter chocolate treats for yourself or as gifts for friends and family, this recipe is a great place to start. The process of making Easter chocolate is relatively simple, and with a few basic ingredients and some creativity, you can create a wide range of delicious and beautiful Easter treats.
Ingredients
Here is everything you need to make this recipe from scratch.
1 cup (200g) dark chocolate chips , we use dark chocolate for this recipe because it has a richer, more intense flavor than milk chocolate, and it’s also better for melting and molding.
1 cup (200g) milk chocolate chips , milk chocolate is used to add a creamy and sweet element to our Easter chocolate creations.
1/2 cup (100g) white chocolate chips , white chocolate is used to add a decorative element to our Easter chocolate creations, and it’s also a great way to add a bit of sweetness and creaminess.
1 tablespoon (15g) shortening (such as coconut oil or vegetable shortening) , shortening is used to help melt the chocolate and give it a smooth and creamy texture.
Food coloring (optional) , if you want to add a bit of color to your Easter chocolate creations, you can use food coloring to dye the chocolate.
Easter-themed molds and decorations (optional) , if you want to create intricate and detailed Easter chocolate creations, you can use Easter-themed molds and decorations.
Why These Ingredients
Dark Chocolate Chips
Dark chocolate chips are the base of our Easter chocolate creations. We use them because they have a rich, intense flavor and a smooth, creamy texture.
Dark chocolate is also better for melting and molding than milk chocolate, which makes it perfect for creating intricate Easter chocolate creations.
When choosing dark chocolate chips, make sure to select a high-quality brand that has a high cocoa content (at least 70%). This will ensure that your Easter chocolate creations have a rich, intense flavor and a smooth, creamy texture.
Milk Chocolate Chips
Milk chocolate chips are used to add a creamy and sweet element to our Easter chocolate creations. Milk chocolate has a milder flavor than dark chocolate, and it’s also sweeter and creamier.
When choosing milk chocolate chips, make sure to select a high-quality brand that has a high milk content.
Milk chocolate is perfect for creating Easter chocolate creations that are sweet and creamy, such as decorated chocolate bunnies and Easter eggs. You can also use milk chocolate to create intricate designs and patterns on your Easter chocolate creations.
White Chocolate Chips
White chocolate chips are used to add a decorative element to our Easter chocolate creations. White chocolate has a sweet and creamy flavor, and it’s perfect for creating intricate designs and patterns on your Easter chocolate creations.
When choosing white chocolate chips, make sure to select a high-quality brand that has a high cocoa butter content. This will ensure that your white chocolate has a smooth, creamy texture and a sweet, creamy flavor.
Instructions
Let’s walk through every step in detail so your Easter chocolate creations turn out perfectly.
Step 1: Melt the Chocolate , melt the dark chocolate chips in a double boiler or in the microwave in 30-second increments, stirring between each interval until smooth. Make sure to stir the chocolate constantly to prevent it from burning or seizing up.
Step 2: Add the Shortening , once the chocolate is melted, add the shortening and stir until combined. The shortening will help to give the chocolate a smooth and creamy texture.
Step 3: Add the Milk Chocolate , melt the milk chocolate chips in a double boiler or in the microwave in 30-second increments, stirring between each interval until smooth. Once the milk chocolate is melted, add it to the dark chocolate and stir until combined.
Step 4: Add the White Chocolate , melt the white chocolate chips in a double boiler or in the microwave in 30-second increments, stirring between each interval until smooth. Once the white chocolate is melted, add it to the dark chocolate and milk chocolate mixture and stir until combined.
Step 5: Color the Chocolate (Optional) , if you want to add a bit of color to your Easter chocolate creations, you can use food coloring to dye the chocolate. Make sure to use a high-quality food coloring that is specifically designed for use with chocolate.
Step 6: Create the Easter Chocolate Creations , once the chocolate is melted and colored (if desired), you can start creating your Easter chocolate creations. You can use Easter-themed molds and decorations to create intricate and detailed Easter chocolate creations.
How To Serve
serve your Easter chocolate creations in a decorative basket or box, perfect for gift-giving or as a centerpiece for your Easter table. You can also serve your Easter chocolate creations on a platter or tray, surrounded by fresh flowers or greenery.
serve your Easter chocolate creations with a side of fresh fruit or nuts, perfect for a healthy and delicious snack. You can also serve your Easter chocolate creations with a side of whipped cream or ice cream, perfect for a decadent and indulgent treat.
serve your Easter chocolate creations at room temperature, perfect for a quick and easy snack. You can also serve your Easter chocolate creations chilled, perfect for a refreshing and cooling treat on a warm day.
serve your Easter chocolate creations as a gift, perfect for friends and family who love Easter chocolate. You can package your Easter chocolate creations in decorative bags or boxes, and add a personalized note or card for a special touch.
How To Keep Leftovers
Room Temperature
store your Easter chocolate creations at room temperature in an airtight container, away from direct sunlight and heat sources. Make sure to keep the container tightly sealed to prevent the chocolate from melting or becoming sticky.
When storing your Easter chocolate creations at room temperature, make sure to check on them regularly to ensure that they are not melting or becoming sticky. If you notice that your Easter chocolate creations are starting to melt or become sticky, you can move them to the refrigerator to keep them cool and fresh.
Refrigerator
store your Easter chocolate creations in the refrigerator in an airtight container, away from strong-smelling foods and direct sunlight. Make sure to keep the container tightly sealed to prevent the chocolate from absorbing any odors or flavors from other foods.
When storing your Easter chocolate creations in the refrigerator, make sure to check on them regularly to ensure that they are not becoming too cold or developing any condensation. If you notice that your Easter chocolate creations are becoming too cold or developing condensation, you can move them to room temperature to keep them fresh and ready to serve.
Freezer
store your Easter chocolate creations in the freezer in an airtight container, away from direct sunlight and heat sources. Make sure to keep the container tightly sealed to prevent the chocolate from becoming freezer burned or developing any off flavors.
When storing your Easter chocolate creations in the freezer, make sure to check on them regularly to ensure that they are not becoming too frozen or developing any ice crystals.
If you notice that your Easter chocolate creations are becoming too frozen or developing ice crystals, you can move them to room temperature to keep them fresh and ready to serve.
Top Tips
Tip 1: Use High-Quality Chocolate
When making Easter chocolate creations, it’s essential to use high quality chocolate that has a rich, intense flavor and a smooth, creamy texture.
High quality chocolate will give your Easter chocolate creations a professional and polished look, and it will also ensure that they taste delicious and indulgent.
Tip 2: Experiment with Different Flavors
When making Easter chocolate creations, don’t be afraid to experiment with different flavors and ingredients.
You can add nuts, fruit, or spices to your chocolate to give it a unique and delicious flavor, or you can try using different types of chocolate to create a variety of flavors and textures.
Tip 3: Use Easter-Themed Molds and Decorations
When making Easter chocolate creations, use Easter-themed molds and decorations to create intricate and detailed designs.
Easter themed molds and decorations can help to add a festive and celebratory touch to your Easter chocolate creations, and they can also help to make them look more professional and polished.
Final Thoughts
Making your own Easter chocolate creations can be a fun and rewarding experience, and with a few simple ingredients and some creativity, you can create a wide range of delicious and beautiful Easter treats.
Whether you’re looking to make Easter chocolate creations for yourself or as gifts for friends and family, this recipe is a great place to start.
Easter Chocolate: Create Your Own Delicious Easter Treats
Description
Ingredients
Instructions
-
Melt the chocolate in a double boiler or in the microwave in 30-second increments, stirring between each interval until smooth.
-
Add the shortening and stir until combined.
-
Add the milk chocolate and stir until combined.
-
Add the white chocolate and stir until combined.
-
Color the chocolate with food coloring (if desired).
-
Create the Easter chocolate creations using Easter-themed molds and decorations.
Nutrition Facts
Servings 12
- Amount Per Serving
- Calories 200kcal
- % Daily Value *
- Sodium 5mg1%
- Potassium 50mg2%
- Total Carbohydrate 20g7%
- Dietary Fiber 2g8%
- Sugars 15g
- Protein 2g4%
- Calcium 10 mg
- Iron 1 mg
- Phosphorus 50 mg
- Magnesium 10 mg
- Zinc 1 mg
* Percent Daily Values are based on a 2,000 calorie diet. Your daily value may be higher or lower depending on your calorie needs.
Note
You can customize this recipe to fit your own personal style and preferences by using different types of chocolate, adding nuts or fruit, or using different molds and decorations.
Frequently Asked Questions
Is this recipe easy to make?
Yes, this recipe is very beginner-friendly and comes together in under 30 minutes.
Can I make it ahead of time?
Absolutely. You can prepare it up to 2 days in advance and store it in the fridge.
What type of chocolate is best for this recipe?
Dark chocolate is best for this recipe because it has a richer, more intense flavor than milk chocolate, and it's also better for melting and molding.
Can I use white chocolate instead of dark chocolate?
Yes, you can use white chocolate instead of dark chocolate, but keep in mind that it will give your Easter chocolate creations a sweeter and creamier flavor.